

Automating Scrap Yard Operations: Step-by-Step Guide
Running a scrap yard today isn’t as simple as it used to be. Prices swing like crazy, new compliance rules keep piling up, and good help? Harder to find than ever.
With all that going on, sticking to paper tickets and Excel sheets can quietly drain your time and profits. That’s where scrap yard automation really earns its name. It will help you cut the clutter, speed up weigh-ins, and keep every load accounted for.
In this guide, we’ll walk through exactly how to take your yard from manual to digital. You’ll see how to pick the right software, hook up your hardware, train your crew, and measure your ROI without guessing. By the end, you’ll know what it takes to automate your scrap yard and actually make it pay off..
Why Automate Your Scrap Yard?
If you’ve ever spent half your day chasing missing tickets or fixing scale mistakes, you already know why scrap yard automation matters. Manual systems might feel familiar, but they eat up hours you could spend moving more metal and making smarter pricing calls.
By automating, you’re not just saving clicks, you’re tightening every part of your workflow. Modern recycling management software helps cut human errors, speeds up weigh-ins, and gives you real-time visibility into what’s coming in and going out.
According to a recent Capterra review of recycling and waste management tools, the most in-demand features among yard owners include digital ticketing, automated pricing, and live inventory tracking.
Key KPIs to watch: tickets processed per day, time saved per ticket, throughput per shift, and total daily margin accuracy. Track those, and you’ll see the benefits of recycling software turn into measurable results fast.
Pre-Implementation Checklist: What To Audit Before You Buy
Before jumping headfirst into automation, it’s worth slowing down to take stock of how your yard actually runs today. Think of it as a tune-up before bolting on a new engine. The goal is simple: make sure your scrap metal inventory system fits the way you work, not the other way around.
Current Processes: Ticketing, Scales, Reconciliation
Start with what’s already happening on the ground. How are you weighing loads, printing tickets, and closing the books at the end of the day? Are scale readings entered by hand?
How often do totals need to be fixed or double-checked? These small details show you where time (and money) quietly slips away. Jot down where delays happen, those are the first places automation should target.
Data You Need to Keep
Next, look at your paper and spreadsheets. Which records are non-negotiable? Usually, that means past tickets, customer lists, commodity codes, and weight histories.
Clean it up before you migrate, get rid of duplicates, fix odd spellings, and make sure customer IDs match across sheets. Good data means fewer headaches later.
Hardware & Connectivity Audit
Now check your gear. Are your scales digital and connected? Do label printers still jam every other day? Can your Wi-Fi handle tablets out by the yard?
A quick tech audit saves you from mid-rollout surprises. For most yards, you’ll want tablets with at least 4GB RAM, a solid network connection, and weather-ready printers that can survive the dust and heat.
Getting these basics right before investing in software makes the switch smoother, and your new scrap metal inventory system will perform exactly how you need it to.
Choosing The Right Scrap Yard Software
There’s no shortage of software claiming to “fix” your yard problems. However, not every program was designed with real-world scrap work in mind. The right scrap yard software should make your day smoother. So before you sign up for a shiny new system, here’s what really matters.
Must-Have Features
If you check out Capterra or GetApp, the best-rated platforms all focus on the same few things, the stuff that actually keeps your yard moving:
- Digital ticketing that streamlines weigh-ins for quick and error-free results.
- Real-time inventory so you always know what’s sitting in your piles or ready for shipment.
- Compliance reports that keep regulators happy without you spending half a day digging through paperwork.
- A pricing engine that adjusts automatically with market swings.
- A simple mobile app your crew can use without a tech manual.
- Solid integrations with your scales, accounting, and payment systems.
Those six things alone can turn a messy operation into a tight, trackable business. Everything else, dashboards, analytics, or “AI-powered insights comes second.
Vendor Evaluation Checklist
Now comes the real test: comparing vendors. Forget the buzzwords; focus on proof. Ask for a live demo, not just a slideshow. Talk to another yard that’s actually using it. Here’s a short list to keep handy (and yes, it’s worth turning into a downloadable checklist for your team):
- Is pricing clear or buried under “custom quote” talk?
- Do they offer a real trial or pilot, not just a video?
- How fast does support respond when you call or text?
- Can you export your data at any time?
- Do they have local references who can vouch for uptime and service?
If a vendor hesitates on any of that, keep shopping.
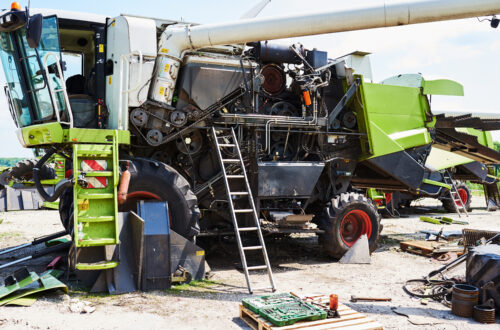
Hardware & Integrations
Getting the right software is only half the story; the hardware and how it all connects can make or break your setup. If the tools on the ground don’t sync smoothly with your system, even the best software will feel clunky. Think of this step as wiring the nerves of your digital yard.
Scales, Scanners, and Other Essentials
Start with your digital scales, since they’re the heartbeat of every transaction. Your software should capture scale readings automatically and generate instant tickets. Make sure the scales connect directly to your system through stable cables or wireless links to avoid lag or errors.
Add barcode scanners and label printers to speed up load identification and inventory tracking. Each pile, bin, or bale can have a tag that tells your system exactly what’s where.
Receipt printers and tablets are also worth the investment. Tablets keep your crew mobile, letting them record loads, take photos, or adjust prices on the spot. And if you handle payments at scale, a POS system linked to your accounting or ERP software saves hours of reconciliation work later.
Step-By-Step Pilot & Rollout Plan

Rolling out new software doesn’t have to shut your yard down for weeks. The trick is to start small, test it where it matters most, and let your crew build confidence before you go all in. Here’s how most successful yards ease into scrap yard automation without chaos.
Phase 0 — Prep (1–2 Weeks)
First, grab a notebook and walk the yard. Watch how tickets move, how weigh-ins happen, and who double-checks what. Pick one area to test the software instead of flipping the whole yard at once.
Quick list:
- Choose your pilot team.
- Write down the current workflow, step by step.
- Set one or two clear goals (for example: “cut ticket time in half”).
Phase#1: Setup (1 Week)
Once the groundwork’s clear, install your new system. Connect scales, import a bit of old ticket data, and get a feel for how it talks to your hardware.
If you’re using BuyScrapSoftware, their setup wizard walks you through the basics and checks scale connections automatically.
Do this:
- Test each scale connection.
- Upload a few customer and commodity records.
- Print a couple of sample tickets to confirm the readings line up.
Phase#2: Training (2–4 Days)
Now it’s your crew’s turn. Let the cashier and supervisor run through a few real-world jobs inside the software. No long PowerPoints, just hands-on practice.
Do this:
- Run mock weigh-ins and payouts.
- Review how to void, edit, and reprint tickets.
- Check reports together at the end of each shift.
Phase#3: Live Pilot (≈30 Days)
Time to put it to work. Run the software during one shift while keeping your paper system as backup. You’ll see quickly how it holds up under real traffic.
Track::
- Average ticket time.
- Daily totals vs. paper numbers.
- Any repeat errors or slow spots.
Phase#4: Iterate & Full Roll-Out
After the 30-day test, gather your notes, fix what needs fixing, and then expand yard-wide.
Before you scale up:
- Adjust settings based on feedback.
- Retrain anyone who missed the pilot.
- Double-check reports and backups.
Sample Rollout Calendar (6 Weeks)
| Week | Focus | Key Tasks |
|---|---|---|
| 1 | Prep | Map workflows, pick pilot team |
| 2 | Setup | Install, connect scales, import sample data |
| 3 | Training | Run mock jobs, review reports |
| 4–5 | Pilot | Operate live, collect feedback |
| 6 | Full Roll-Out | Apply lessons, expand to all shifts |
Conclusion
At the end of the day, automating your yard isn’t about chasing shiny tech, it’s about making life easier. When tickets stop piling up, reports come together in minutes, and your crew isn’t tied to clipboards all day, that’s when it clicks.
The numbers start to speak for themselves, fewer mistakes, faster payouts, smoother shifts. You don’t have to overhaul everything overnight either. Just run a small pilot, track what changes, and build from there.
Most yards see the difference within the first month. If you’re curious where to start, BuyScrapSoftware makes that first step simple, one setup, one shift, and you’ll see the payoff right away.


You May Also Like
Cloud vs On-Premise Scrap Software: Pros & Cons (2025)

Scrap Yard Software Upgrade: 5 Red Flags You Can’t Ignore